Thursday, May 13, 2010

Here it is….my final reveal for Life Preservers April Alternate kit!


Using my cricut and Storybook cartridge, I cut the flowers from the gold cardstock (in kit). I used Distress inks to do some shading, and add a bit of color. With a spritz of Glimmer Mist, I added a bit of shimmer. Once the mist had dried, I gave the flowers a bit of texture by embossing them with my cuttlebug. Lastly, I added some stickles (in kit) and pearls.


non kit items:distress ink, distress paint, thickers, pearls, cardboard, floss, rubon, brads, bling circle, button

Check out my journaling strips?! Yep! I didn’t even notice until I was posting the photo! Although, it probably suits us best left this way!! :)

I created this for the challenge of the week. Why don't you come on over and play!!

Thanks for stopping by!

Monday, May 10, 2010

Magnificent Monday!!

You still have a few days left to enter your submission for ScrapFit challenge #19. The only requirement is to use your old stash, nothing new. Easy enough!! Lets see those entries!!

Here are a few more goodies from Life Preservers April Alternate kit! The colors coordinate perfectly with our school colors so I couldn’t help but do at least one sporty page! I wanted to keep the embellishments to a minimum and let the photos speak so I added texture by using a boarder punch, and embossing my matting and stars. The Mesh Cuttlebug emboss folder reminded me of the texture of a basketball. How perfect is that!!


Non kit items: distress ink; cardboard; chain, tag; rubons; boarder punch; distress paint


With only a few small scraps left, I decided to create a couple cards. This card is for my Father-in-laws upcoming birthday/Father’s Day bash.


Non kit items: buttons; floss; rubon; Nestabilities die; distress ink


And another...

non kit items: cardboard; distress ink; distress paint; flourish; pearl; Core'dinations cardstock; marker; eyelets; Cuttlebug emboss folder; Nestabilities die

I created the bird by tracing the negative area of a grungeboard punchout onto a piece of cardboard from a tissue box. After cutting out the bird, I inked the edges with distress inks. Next, I applied a coat of distress paint. The moisture of the paint allowed the ink to bleed into the paint giving a shading affect. Once the paint was dry, I applied a flourish to the wing area and used a pearl for the eye.

I cut the leaves from Core’dinations Cardstock, using my Cricut and Storybook cartridge. I sanded the edges of the leaves, and rubbed a line in the center of the leaves using a Basic Grey sanding tool.


Thanks for stopping!! Have an awesome day!

Saturday, May 1, 2010

Happy National Scrapbooking Day!!

In celebration, the Design Team at Life Preservers has put together a fun blog hop full of challenges (4 to be exact!) and eye candy!!

Lisa and I have teamed up to bring you a fun sketch and the opportunity to celebrate Earth Day! If you follow my blog, you know how I love to use recycled items on my layouts!! With that in mind….
My requirement for your layout, is to add at least one recycled item...packaging, tag, cardboard, whatever you can scrounge from your recycling bin. For the other half of our challenge, visit Lisa’s blog for the super fun, cute sketch!

For my example, My recycled items consist of Prima packaging (they have the prettiest packaging ever!) as my photo mat; Hubby’s old blue jeans (heart); and a milk jug (butterflies)!! Yep, really!! I pulled an old Life Preservers kit and compiled all my goodies together based on the sketch found on Lisa’s blog.


To participate in our blog hop, visit each of the Design Teams blogs. As you complete the challenge posted, link your creation to the applicable blogs in their comments sections. (You can link this from your gallery on Life Preservers if you would like. ) For each challenge that you do, you will be entered into a random drawing for a prize from Life Preservers.
The teams are: Melissa & Andrea - Challenge #1
Laura Lee & Gabrielle - Challenge #2
Sharon & Rhonda - Challenge #3
Me (Jodi) & Lisa - Challenge #4

Thank you so much for participating in Life Preservers first annual NSD Blog Hop. Please hop on over and visit Lisa to see what else is in store for the hop. "

Here is the blog hop order:

1. Melissa

2. Andrea

3. Laura Lee

4. Gabrielle

5. Sharon

6. Rhonda

7. Jodi (You are here)

8. Lisa
oops, Lisa is having trouble with her blog today. Skip Lisa and head on over to Life Preservers!
9. Life Preservers


Being May 1st, is it time for ScrapFit Challenge #19! The challenge is to use older items from your stash only...nothing new! I used papers and goodies from an older Life Preservers kit! I just about killed that kit now! Love that feeling!! You have until May 14th to complete this challenge! Don't forget to link to ScrapFit!

Have fun! And thanks for stopping by!!

Tuesday, April 27, 2010

Life Preservers April Alternate Kit


Wohoo! I finally found time to play with the April Alternate Kit from Life Preservers. I must say what a pleasure it has been. These fun, masculine papers from Scrap Within Reach have been such a treat!

Thinking the colors are perfect for black and white photos, I dug out some old photos of my dad. The sticker letters were to large for the area that I wished to contain my title, so I cut the excess off around the letters to make them fit.


Using the cricut, I cut the leaves from the gold cardstock in the kit. I used Ranger distress inks for shading, then added some stickles for a bit of splash (brown is from kit, green is from my stash)


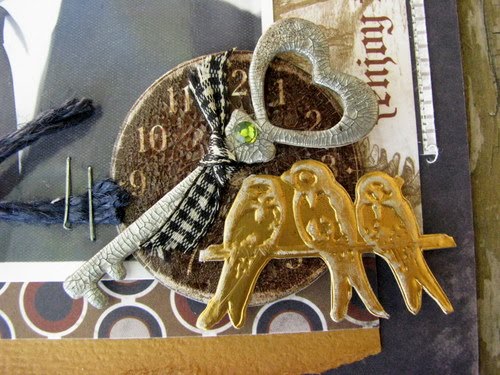
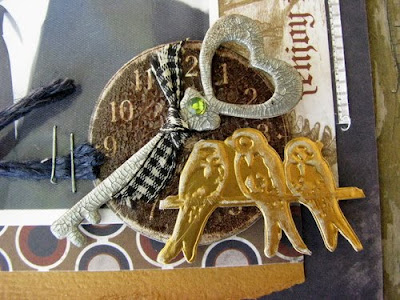
I covered the chipboard clock with Rock Candy Distress Crackle paint. Using Metallic Silver Distress Crackle paint, I covered the key chipboard. After the paint dried, I rubbed it with Walnut Distress ink for an antiqued look.


Non kit items:
Stickles (purchased in Life Preservers online store); Opaline Pearls; Prima Say it in Crystals; Chipboard;
Clock; Rock Candy Distress Paint; Chipboard key; Metallic Distress paint; MM Vintage Findings; Staples; Stitching; ribbon


Next, I dug out the first photo ever taken of our farm. My husbands grandfather purchased the farm in 1946, later selling it to my father-in-law, and now my husband has acquired it. Being it has been a dairy farm for all these years, I just had to add some of the dairy chipboard buttons from Jenny Bowlin!!

Again, I cut the letters to fit in my Title area.


Non kit items:
Prima flower spray (from previous LP kit); Jenny Bowlin chipboard buttons (previous LP kit); buttons; 7 gypsies ticket (from previous LP kit); thickers; floss; distress ink; stitching; MM Vintage Findings; black cardstock; mesh


Last but not least, I created this little tag book for my purse. While shopping, I can never remember which colors of distress ink, distress paints, mists, stickles, ect that I have previously purchased. I also added sample colors of each product I own for matching papers, ribbon, ect. Of course I added several blank sheets at the back of the book for future purchases!!


I cut the tags using the School Plantin cricut cartridge. I used white cardstock in order to get a true feel of the colors.


Non kit items:
White cardstock; sticker


Thanks for stopping by!

Monday, April 19, 2010

More October Afternoon goodies!

I’m here! I’m here!!

A couple weeks ago, I started this project using the October Afternoon goodies in the Alternate Kit from Life Preservers. I finally got a chance to work on it again.

I perused the local thrift shop and found this old book for 50 cents! I loved the theme of the cover and thought it would be perfect for a mini I wanted to do using my school photos.


After removing the pages from the book, I used my Crop-O-dile, to punch holes.


Here are some of the pages. I am missing photos from a few years. I will add more pages as I aquire those photos.


a close up of a few of the techniques I used.


non kit items used: cork stickers, metal charm, letter pebbles, acrylic letters, trim, lable holder, punches, marker, Distress Ink, stitching, Distress paints, cardboard, stickles, chipboard, gemstones, pearls, felt, burlap, buttons, staples, badges, tab, coffee cup coaster, floss, grunge paper, rubons

Wednesday, April 7, 2010

March Alternate Kit from Life Preservers

Did you all have a wonderful Easter?! Ours was fab-U-lous! Our son has been overseas for nearly two years. He arrived back in the states last week, and we were able to pick him up at the bus station Easter morning! Coincidence that he arrives on the day of resurrection, the time when we are reminded of Gods love, grace, and forgiveness?! I think not! The lord has shown me all along that this was the path the he had chosen for Brett. Once again, I believe Gods timing is perfect!

As you can imagine, I’ve been a bit preoccupied! However, I did squeeze in a bit of scrappy time! With my scrappylicious new March Kit from LP sitting on my desk, well I just couldn’t resist!! This Kit it is stuffed with marvelous papers and goodies from October Afternoon! I just love OA! *swoon* I was able to put together a couple layouts so far. I have photos printed and papers cut for a little project, hopefully I can get it put together by the end of the week!

I just love this photo!! This photo of my great-grandmother was taken for the paper commemorating her 40+ years of service as the school cook. She insisted that she make homemade bread for the entire student body. The school never bought a loaf of bread until after her retirement….now that is an incredible commitment in my book!! I’ve not yet added journaling, as I want to make sure I get dates and more details before I do!


I created the flour sack by cutting my sack shape out of cardboard, then gluing burlap to the cardboard. Once the glue was dry, I trimmed the burlap around the cardboard.

The bowl was created from a Caribou Coffee Sleeve.

The oven mitt was hand cut from felt.


For the title, I put Crackle Accents over the sticker letters. Once the Crackle Accents had dried, I rubbed Walnut Distress Ink over the cracks to give more of an aged look.


non kit items: distress ink, Crackle Accents, burlap, coffee sleeve, felt, marker, black pattern paper (from previous kit), Cuttlebug embossing folder, Stampin' Up border punch, EK Success border punch, stitching

I just love the blue/green combo of these papers! Using my Cuttlebug, I embossed the green cardstock to add more texture rather than adding more embellishments. The clock is cut from one of the OA Wildcards. The little guy is a chipboard shape from Maya Road. I covered it with burlap using the same technique as the flour bag on the layout above.

non kit items:Distress Ink, Maya Road chipboard boy, burlap, felt, button, Cuttlebug embossing folder, transparency, marker, Creative Memories corner rounder, Crop-A-Dile II (punch holes in scallops)

thanks for stopping!!!

Thursday, April 1, 2010

ScrapFit Challenge #17

Time for another ScrapFit challenge!

Challenge #17
Create with an egg shape…work your magic on an altered egg, egg shaped card, or wherever your imagination takes you!!

After a few attempts with a papier-mâché egg, I gave in. It just was not going in the direction I had intended. So, I went with an egg shaped card.


Our sponsor, Jillibean Soup, and donated an awesome prize package!! I can’t wait to see your interpretation!!