Showing posts with label Jillibean Soup. Show all posts

Saturday, November 3, 2012

Font Fun!


Hello! I'm here with a Holiday card full of fun tips and ideas from Cheery Lynn Designs
I started by cutting the base of my card with the largest of the Scalloped Square Stackers Nesting dies, layered with the Classic Square Silver Stacker. The Dainty Dutch Deco Frame adds the perfect elegance to the background on my card.
 To add dimension to my card and letters, I cut the letters "J" and "Y" from the cardboard of a cereal box.
 
 I cut each letter three times. 
 
I stacked each of the letters adhering as I went followed with a cardstock letter, creating the same feel as the expensive store bought letters for a much better price, and custom made to match my project!
For fun, I used the Ornamental Wreath as the “O” in my word. Here is a close up of the fabulous details on the wreath. The Wreath set comes with a beautiful bow die, but I chose to add a real bow for more texture on my card. I tucked in some foliage from the Holly Leaves and Wreath Strip
 
There is still time to enter this weeks challenge for your chance to win the $20 shopping spree! Details Here 
 
Thanks for stopping by!

Sunday, June 10, 2012

Paper Issues Blog Hop

Happy Sunday!
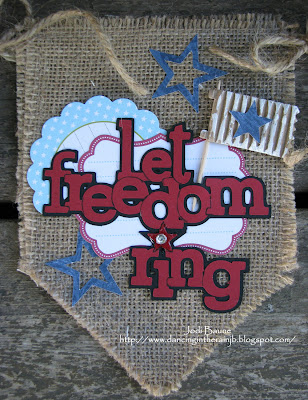
It’s time for a new theme at Paper Issues…Burlap! A huge thank you to Canvas Corp. for sponsoring us!
We are having a little hop to celebrate the new theme! You’ll definitely want to check out all the amazing projects from the other girls participating in the blog hop.

Jodi (Me)

For my project, I used fabulous canvas and banner pieces from Canvas Corp.


I’ll keep my words to a minimum today and let the photos speak for themselves!
Reminder, click on any photo to enlarge for a better view!


For a chance to win a scrappylicious prize from Paper Issues, be sure to become a follower of my blog, Paper Issues blog, and leave a comment on Paper Issues letting us know how much you enjoyed our projects!


Don’t forget to check out Paper Issues store, and use coupon code for a 20% discount! 

Next stop...Shelley

Thank you so much for stopping by!!

Saturday, March 17, 2012

Berry Sweet

Hello!  I back today with a couple projects for Cheery Lynn Designs. First I have a card that was inspired by this weeks challenge, Flourishes.


I started with the Fanciful Flourish and added my strawberries on top. I then cut a second flourish but cut it into pieces strategically tucking in swirls here and there. I’ve also added the Olive Branches and Stacker Flower #1 Leaf. I used the middle size and smallest Dancing Daisies for buds. 
The smallest of the Scalloped Cover Rectangle Stacker set, enhanced with the Coved Rectangle Stitching Tool makes the perfect background for my sentiment sticker.


Other die used: Tiffany Border


My second project is a little off the wall….well, actually it is ON the wall! I decided the words were a bit plain. I cut the Mega Flourish Two in a copper color vinyl and carefully, with the help of transfer tape, applied the flourish around the letters and directly to the wall using the same technique I used in the tutorial found here.


I had so much fun adding the flourish that cut butterflies from Exotic Butterfly Small #2 and added them as well!


Don’t the added flourishes and butterflies really liven up the full arrangement?!


There is still time to participate in this weeks challenge for your chance to win a $20 gift certificate to Cheery Lynn Designs store!  Details here.

Thanks for stopping by!!

Tuesday, May 17, 2011

Fun Fold Out Mini!

I found the instructions for the cutest little mini fold out album at Splitcoast Stampers. I want to share one I created for a baby gift! It's a blend of Jillibean Soup papers, my monthly scrapbook kit from Shawn Davis Designs, and Imaginisce I-rock goodies!!


Using my Jillibean stamp and VersaMark stamp pad, I stamped a few flowers onto the yellow polka dot. After embossing the flowers with clear glitter embossing powder, I finished them off by attaching Imaginisce jewels using my I-rock!


I trimmed some punch pieces to create the frame around the edge. The Jillibean Soup patterns and colors are perfect for a baby book!


Using my Imaginisce I-rock, I added a splash of bling throughout the mini.


Machine stitching, faux stitching, and doodling added a lot of character to the book. The flowers, and scallop rectangles were cut using my Cricut Expression from cartridges Walk in my Garden (flowers), and Storybook (scallop rectangles).


Thanks for stopping by!!


Monday, March 28, 2011

Nuts About Sketches #154

It’s Monday, and time for my reveal at Nuts About Sketches. I opted to turn this weeks sketch to the side, making it more suitable for my choice of photos.


For added interest, I punched a Kraft boder and attached it to the center block. Using long pieces of foam tape, I adhered the center block to the background paper so the entire center block is raised off the background paper!


Sketch #154 I can’t wait to see your version! Thanks for stopping by!

Thursday, March 24, 2011

Flower fun!

As spring approaches, our surrounding blossom into newly refreshed life. It is much to cold and snowy here for flowers yet so I went to work having fun creating my own little indoor blossoms!


I added a little twist to my layers. Leaving the bottom layer straight still giving a nice clean feel. I applied a coat of Ranger Distress Rock Candy to a couple of the birdhouses, and Ranger Glossy Accents to the bird. I dry brushed a dab of Ranger Distress paint to my Jillibean Soup corrugated flowers. While the paint dried, I created a paper rosette to use as one flower center.


I adheared a button tied with a burlap string for the other flower center and attached to a denim flower cut from a pieces of hubby‘s pants. I love the added texture from the Jillibean Soup Bean Seed leaves!


My favorite flowers on here are some I created by using my Jillibean stamp and some burlap!! I put the button sticker onto a chipboard circle to give it more dimension.


I hand stitched around the Jillibean Soup Sprout. Again using my Ranger Rock Candy paint, I dry brushed a bit around the edges of the numbers. I created the charm by hand cutting a heart and adhering it to silver mirror cardstock.


I cut around the heart leaving a silver edge mimicking a metal frame. Once cut, I applied a heavy coat of Ranger glossy accents to mimic a glass cover. Using a pieces of craft wire, I formed a ring and tied a piece of Jillibean Soup Bean Stalks through and tied to the number three.


Another rosette flower.


I used pop dots through out the layout for dimension and added interest!


I hope you enjoyed wandering through my garden today!

Thanks for stopping by!